Monday, February 13, 2012

Weekend Warriors

Some Dark Elf Warriors (Games Workshop) painted over the weekend.  I basecoated them with my airbrush, using the same zenithal highlighting technique I've been talking about lately, and then went in to do the details with a brush.  The highlight isn't as smooth as I'd like it to be, but that comes with practice, I guess.  In any event, these guys are basically cannon fodder, so they're a good choice for practice.  They'll be getting snazzy bases and shields once I decide how to paint them.


Saturday, February 11, 2012

Snow Day

In honor of the snow, here are my latest efforts at making model-sized winter scenery:


These are all 25 mm bases decorated with a variety of "found objects."  On the bases with the black rims, the snow is made from a paste I bought at the craft store.  It was a little grainy for my taste, so I made my own mix of glue, baking soda and white paint, which can be found on the base with the brown rim.  I mixed it a little too thin, but that should be easy enough to fix.  I have some ideas about cool ways to use this technique, but that's for another day.

Friday, February 10, 2012

Sourced Lighting

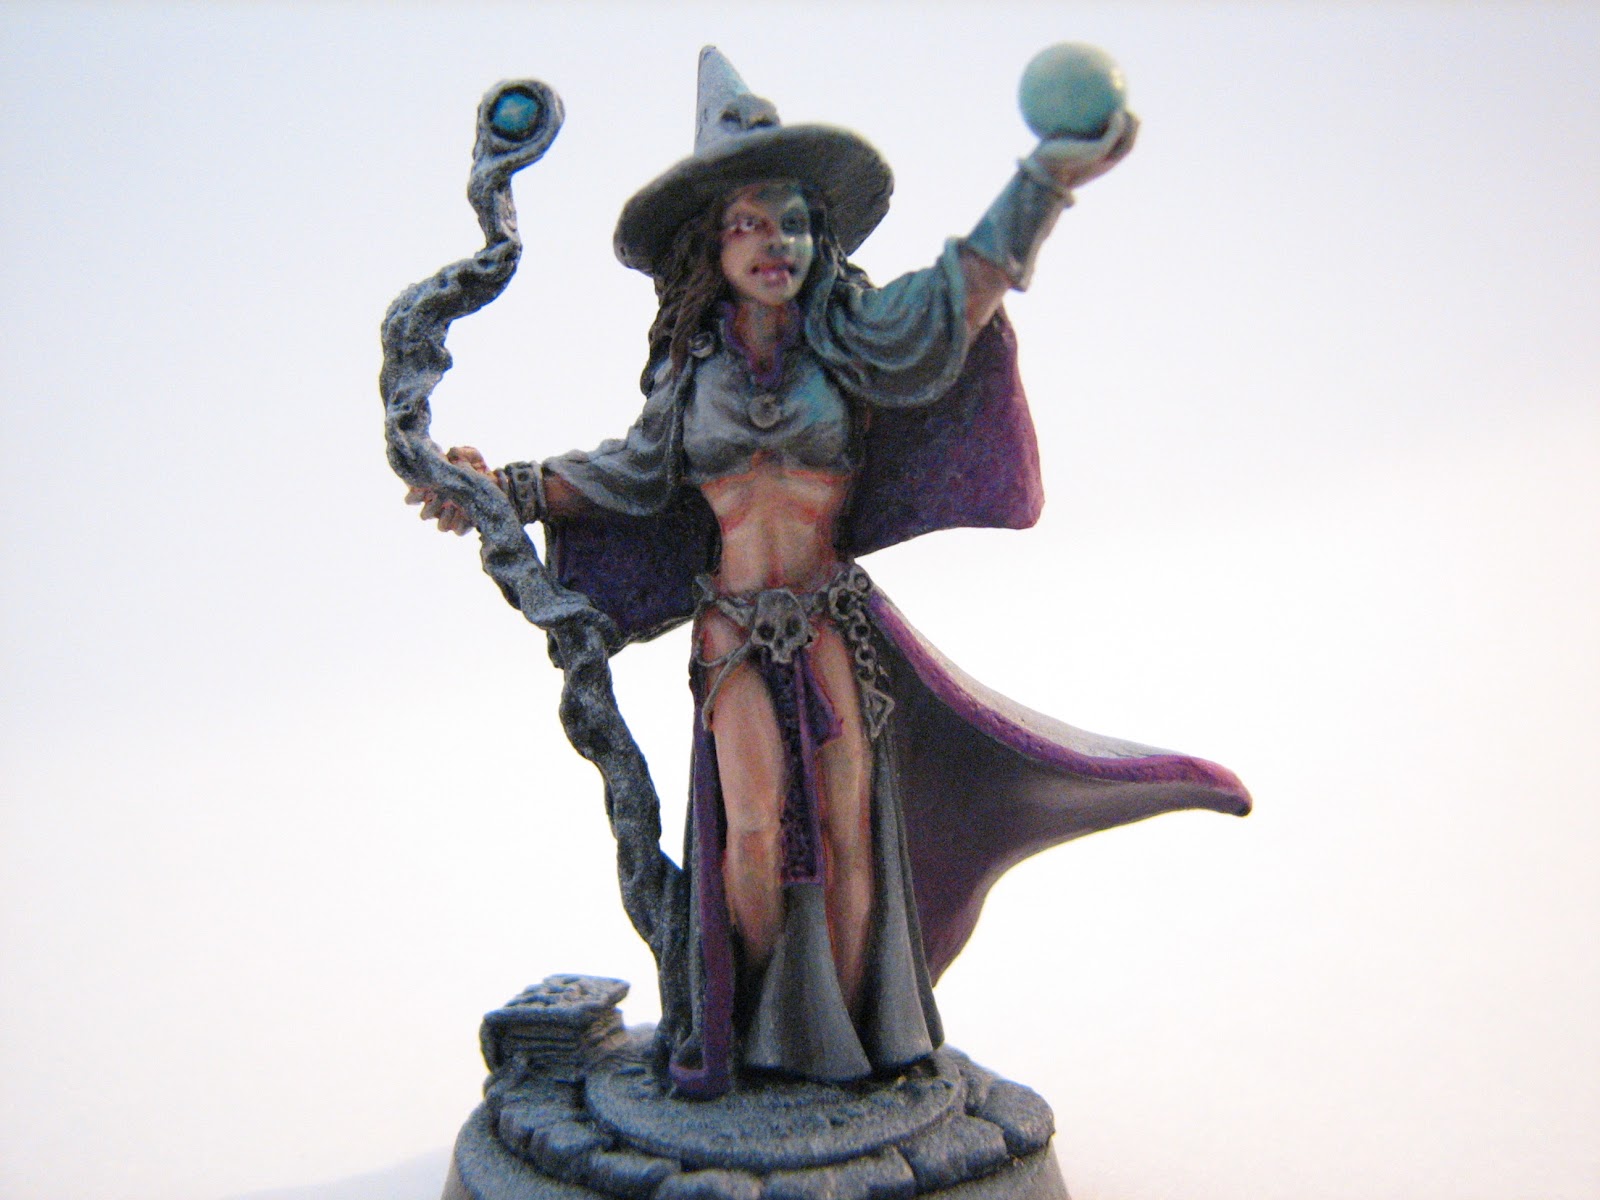
Life has been busy of late, so here are some more in-progress shots of the sorceress.  She's a ways from finished, but you can see the sourced lighting I'm trying to develop.  I personally think it looks best from the rear, but you can see it on her face and arm as well.  The goal here is to make it look as if the orb in her hand is glowing, casting light onto nearby surfaces.  It's a tricky thing to paint, but it looks awesome if you get it right.


Friday, January 27, 2012

Zenithal Highlighting

One of the great joys of owning an airbrush is being able to achieve nice, smooth blends.  Or at least, I imagine it will be a great joy once I get the technique down.  I've been using the airbrush to do some preliminary shading on my models, establishing a zenithal highlight like you would expect if the model was lit from above by a fairly strong light source.  As an example, here's my current project, a Reaper sorceress:

This isn't the greatest photo, but you can see the way the gray progresses from dark to light towards the top of the model.  The orb, the hat and the top of the cloak are especially bright, since they have surfaces facing directly upwards.  The airbrush is great for this because it works like a paint flashlight: you point it down, and the paint goes exactly where the light would go if the model were lit from overhead.

I'm not usually keen on posting work in progress, but here are a couple of shots of the sorceress as she's being painted.  Of late, I've started to work on one color at a time, beginning with the most recessed parts of the model.  So here you can see I've put most of the highlights and shades on the skin.


This close-up shows the face a little better.  What I think it really needs is some more contrast around the eyes and lips, to make the most prominent facial features really stand out.  I'll post more as I paint more, but the basic plan is to paint her in simple colors, and try a sourced highlight coming from the orb in her left hand.  But that's another technique for another post...


Monday, January 23, 2012

Prepare To Be Boarded!

A fine model which I bought from Reaper to get free shipping on my order.  I think his actual name is "Rumscratch, Dwarf Wereshark," but my wife dubbed him "Pirate Shark" and it stuck.


Though I bought him on impulse (because pirates are cool and sharks are cool), it's a really well-sculpted model with lots of neat details: the hermit crab parrot, the key to the treasure chest on his belt, the pegleg.  This is also the first time I used my airbrush to basecoat a model--I airbrushed him grey and gave him a zenithal highlight before I put all the colors in with more traditional methods.  I also thinned my paints much more than usual, and tried a little harder to make the metal parts seem to reflect light in a realistic way.  It's an ongoing process, but I'm happy with the result.  Painting single models is great because you can focus a little more on trying new techniques.  If you have a 20-model squad to paint, you usually want to stick to tried and true strategies that you can apply quickly.  In the future, I plan to alternate between single models, squads and larger models (tanks, dragons, and so forth)--each type of project teaches you something different. 


Friday, January 20, 2012

Learning to Shoot

My camera, that is.  I leave the rest to the Space Marines.  Since I was having trouble getting my images properly focused, I poked around a bit on the internet.  I started with this:

Not a bad photo, but the giant cannon looks a little fuzzy.  By messing with the f-stop, I managed to get this:


Much better.  I do need to get a more dramatic background, though.  The white armchair isn't the most dignified setting.  Perhaps in another post.

Thursday, January 19, 2012

New Blood Angels


Here are some photos of a recent project, a GW Space Marine assault squad painted in the colors of the Blood Angels chapter.


My photography skills are improving, though you can see I'm stil having trouble getting the whole model in focus sometimes.  As far as the paint job goes, these guys are nothing special, but the bright colors and dynamic poses make them look pretty nice as a squad.  Besides, they have jetpacks and chainsaw swords--would you tell them they don't look good?  Thanks to Mom for supplying the squad as a birthday gift last year.